FAQs
FAQ Subject
Make sure the RJ45 cable is properly connected to the PoE switch. Try to re-plug the cable.
Check the IP address of the device by using the PLANET IP Wizard II program or by UPnP discovery or set the device to default by the Reset button.
Yes, it is weatherproof, and can be installed outdoors.
Please follow the steps below:
- Re-power the device if the unit cannot be found within 1 minute.
- Do not connect ICA-3110 over a router. IPInstaller program cannot detect device over a router.
- If IP address is not assigned to the PC which is running IPInstaller program, then IPInstaller program cannot find device. Make sure that IP address is assigned to the PC properly.
- Antivirus software on the PC might interfere with the setup program. Disable the firewall of the antivirus software during the setup of the ICA-3110.
Topology:
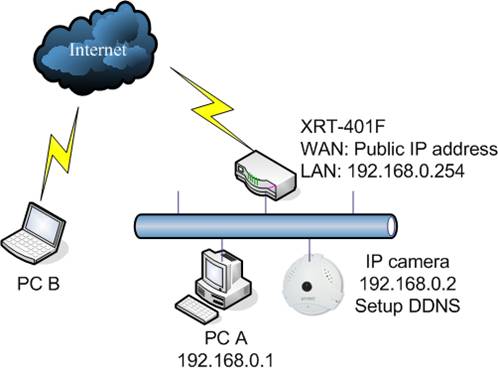
Configure the router
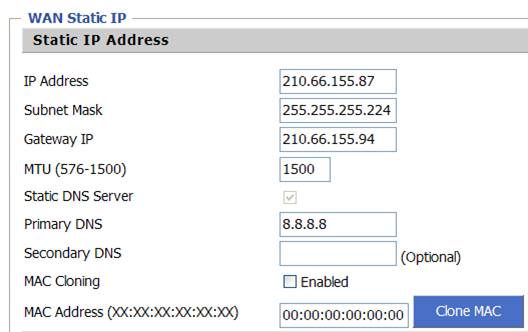
Step 1: Go to the WAN setting page to configure the WAN interface, after setup finished please check PC A could go to internet.
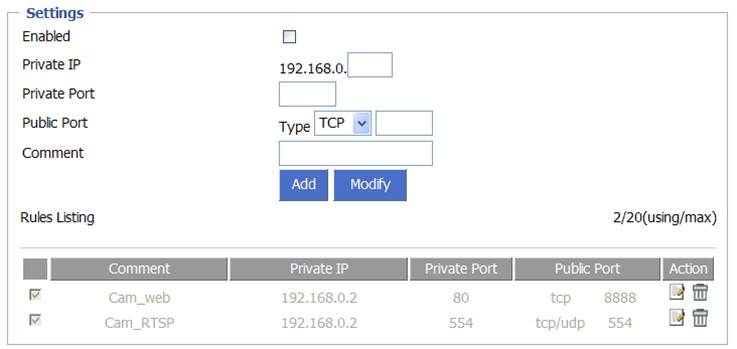
Step 2: Go to the NAT > Virtual server page to setup the port forwarding feature, in this case the camera IP address is 192.168.0.2, it have to enable the web port and RTSP (video stream) port as below, if the web port or RTSP port of camera aren't the default port, you have to check which port does this camera used. After setup finished, try to use PC B to type http://"Public IP address":8888 to check whether can connect to camera.
Configure the camera
Check the DDNS setting of camera, we just use Planet DDNS and easy DDNS to make some explain. Here are some steps for Planet
DDNS as below:
Step 1: Enable DDNS option through accessing web page of camera.
Step 2: Select on DDNS server provide, and register an account if you do not use yet.

Here are some notes for setup the DDNS account, for security reason we keep some key word, so if user use these key work to be their Planet DDNS domain, they will fail to register to DDNS server. Please make sure you didn’t apply those strings in your DDNS account.
$protectNameString = "(www)|(dns)|(mail)|(planet)|(update)|(address)|(apache)|(mysql)|(server)";
Ex:
Ridns123.planetddns.com => it will fail to register Planet DDNS server
Step 3: Add the register domain and device's name, if the DDNS work properly, the ping status should be green and you also can see the DDNS update successful in your camera DDNS page.
DDNS page

Camera DDNS page

After check the DDNS status, PC B could type http://"DDNS domain":8888 to connect with camera.
Please follow the steps for using Safari to access NVR's web UI. (Please be reminded that there are some conditions below of NVR module and firmware version.)
Only compatible with:
MAC OS: version 10.7 or above.
Safari version: 6 or above.
NVR420: FW 1.3.0.63775 or above.
NVR810/1610 V3: not supported.
NVR3210/3250: FW 2.5.0.62204 or above.
1. Install plug-in
After logging in through Safari browser, a message with a red background will be displayed, indicating that you must install the plug-in in order to display the video. Simply click on the message to continue.
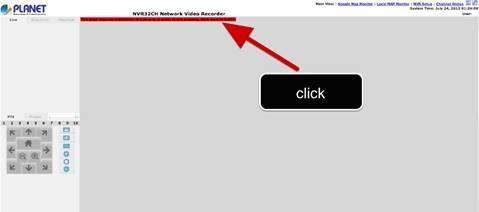
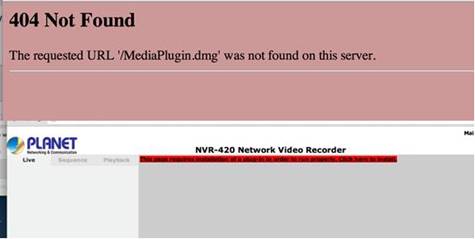
If you see 404 Not Found, just ignore it, and follow the next step.
2. Install plug-in
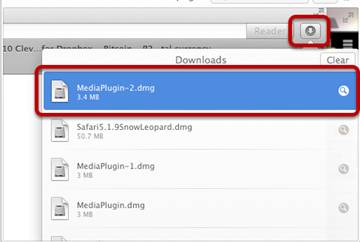
The plug-in will be downloaded and you can find it in the download manager in the upper-right hand corner of the Safari browser. The name of the file is "MediaPlugin.dmg". Click on it to continue or you could drag it to the desktop and then click it.
3. Install plug-in
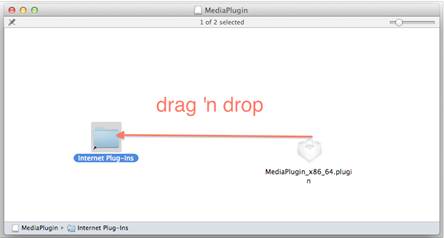
A dialog will appear displaying the content of the MediaPlugin.dmg file. Drag the "MediaPlugin_x86_64.plugin" file and drop it into the "Internet Plug-ins" shortcut folder.
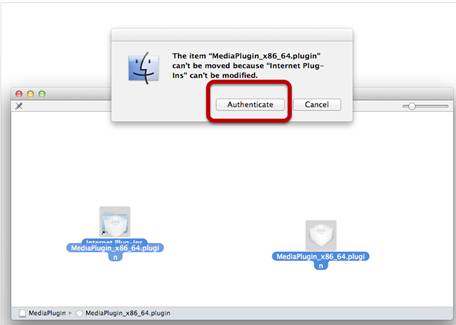
4. Install Plug-in
A warning message will appear asking you to authenticate to proceed with the action. Click on "Authenticate" and enter the admin's username and password of your Mac computer.
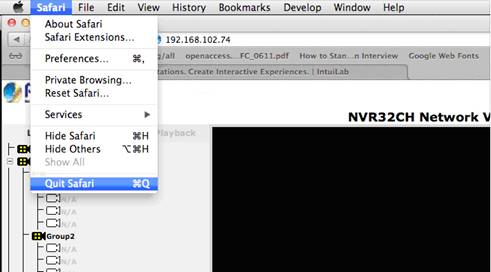
5. Restart Safari
Quit Safari and restart it. The videos should be displayed properly after cameras are installed.
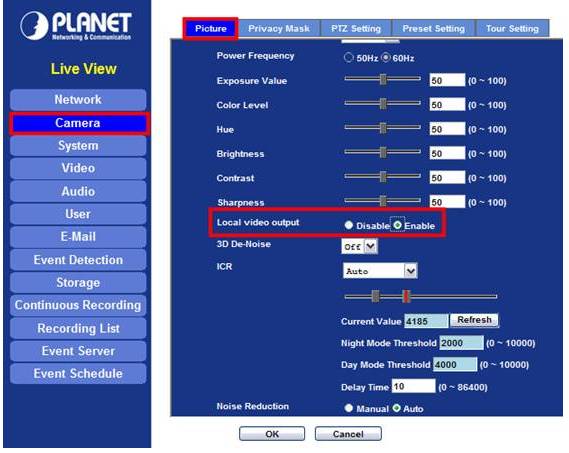
Please follow the instructions below.
1. Please change the resolution to 720P.
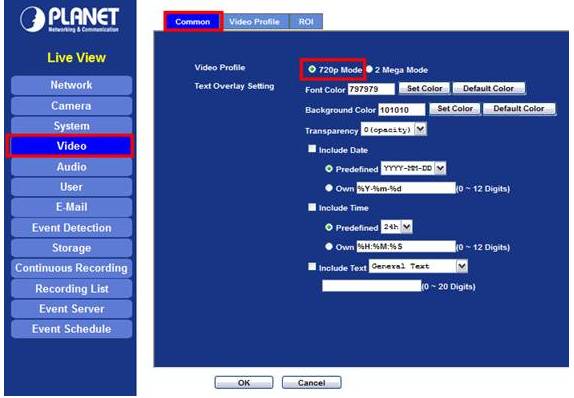
2. Then go to “Camera -> Picture” and enable the “Local video output”.