FAQs
FAQ Subject
Fast Ethernet is full-duplex, so a port can transmit and receive simultaneously. Consequently, if a Fast-Ethernet port is performing at its maximum throughput (e.g. sending and receiving) it can operate near it's theoretical maximum - 200Mbps.
This button can use to reset combo KVM to default settings. Please press this button over 10 seconds, and then release it. The combo KVM switch will reset to factory default.
If the network adapter does not connect to the network
1. Update Driver: Make sure that you have the latest version of the 10/100 CardBus driver.
2. Update BIOS: Check with your Notebook PC manufacturer for the latest BIOS upgrade to support CardBus.
3. Check Cable Connections: Make sure your network connection is secured and functioning properly. You may need to replace cables with known good cables.
4. Check LED Status: Make sure the Link LED lights are lit properly on the card and Hub (if applicable).
5. Check Device Status: For Windows 98 or Windows 95: make sure that your device driver does not have a red "X" or yellow "!" shown in the Device Manager. For Windows NT 4.0: check the Event Viewer to make sure there are no resource conflicts.
Install the Adapter and Driver again
If the device status shows that the adapter is not working properly. You will need to remove the network adapter driver and related network components, then install it again.
Run the Configuration Utility, it will show you the current speed and signal strength of the PL-201.
The PL-501 is a 200M Powerline Ethernet Bridge. It should work with the same HomePlug AV device which is another PL-501. It could co-existence with HomePlug 1.0 or HomePlug 1.0 Turbo such as PL-104 or PL-420.
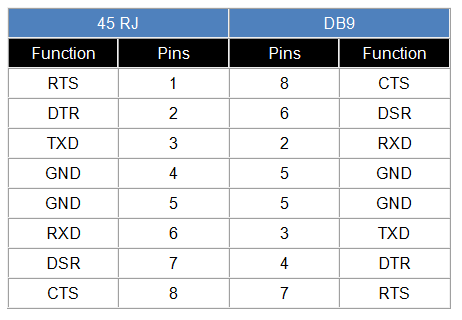
The console cable is not included in the package. You need to buy this cable. The RJ45-to-DB9 cable is needed in order to connect with the computer COM port. The pins of the RJ45-to-DB9 cable are corresponding to different parts as described below:


9-pin D-sub female connector RJ45 connector
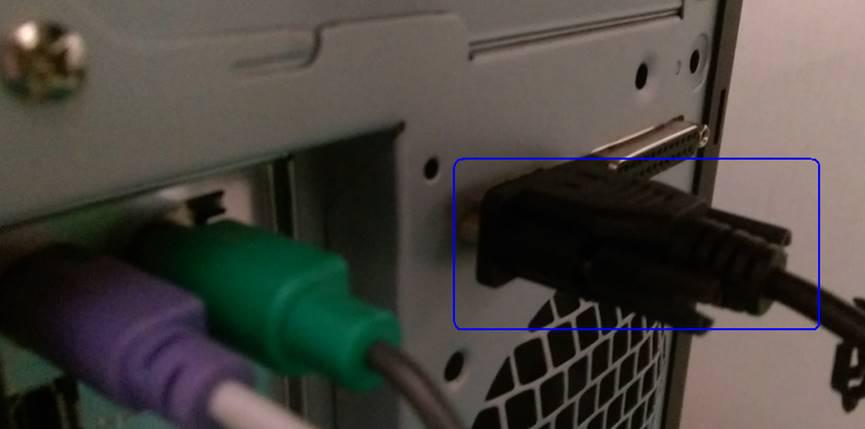
Step 1. Connect to PC and COM port 1 via the console cable.
Step 2. Go to Computer management and check whether Switched IPM is detected.

Step 3. Go to Serial port è Switch Kind of Serial Port 1 to Console.
Note: Check whether the data rate and the other setting are the same with PC.

Step 4. Open and set the console tool to PuTTY.

Step 5. Enter the account and password that are used to log in the main menu of Switched IPM.

Step 1. Go to System è SNMP è Enable SNMP v1/v2

Step 2. Open the SNMP tool under. iReasoning MIB browser.

Step 3. Go to Tools è Options.

Step 4. Go to Agents and click “add”.

Step 5. Enter the IP address of IPM and Reader/Write community and select SNMP v2.

Step 6. Load MIBs.
Note 1. Please ask PLANET support team about this MIB file
Note 2: Please clear the other MIB file

Step 7. Go to the device table è deviceOutTotal è click “Walk”.

Step 8. Find the outswitchCtrl 1~8 è click “Set” and 1 is power ON / 2 is power OFF