FAQs
FAQ Subject
Please follow the steps below to configure Local Radius Server and Captive Portal:
1. Set the AP to Gateway mode and ensure it has Internet access.

2. Go to Wireless → 2.4GHz WiFi → Basic.

3. Set Encryption to "WPA/WPA2 Enterprise”and RADIUS Type to “Local”, then click the “Apply Settings” button.

4. If necessary, repeat the same configuration for 5GHz WiFi.
5. Go to System → RADIUS → Server.
Set the RADIUS Server Mode to“Enable”, then click the“Apply Settings” button.

6. Go to the User Account page and create a new RADIUS user account , then click the“Apply Settings” button.

7. Go to System → Captive Portal → Config.

8. Set Captive Portal to“Enable”, select “LAN”as the Interfaces, then click “Apply Settings” button.

9. Go to Custom page and configure additional settings as needed, then click “Apply Settings” button.

After completing the above configuration, wireless clients will be prompted to enter their RADIUS username and password on the Captive Portal page.
Once authenticated successfully, they will be able to access the Internet.

If your switch is shown “unsupported” on NMS-500, please refer the steps below to fix the issue.

1. Login the switch’s web management, check whether the Remote NMS Configuration is disable.

2. If it is disabled, first remove the switch from the NMS-500’s Device List.
![]()
3. Set the Remote NMS Configuration to “PLANET NMS Controller-LAN”, then click the “Apply” button.

4. Set the SNMP feature as “Enable”, click the “Apply” button.

5. Enable the LLDP feature and set the LLDP PDU Disable Action to “Filtering”, then click the “Apply” button.

6. Save all changes to the Startup Configuration.

7. Re-add the switch to the NMS-500.
8. After completing these steps, the switch should display the status as “Supported”.

In this example, WDAP-C7210E is used to work with WS-1032P.
Default IP address:
WS-1032Pà192.168.1.100
WDAP-C7210Eà192.168.1.253

1. Add IP Routes setting and press the Apply button to save the setting.

2. Add WDAP-C7210E to AP Management of WS-1032P.

3. Configure SSID profile contents and then press the Apply button to take effect.

4. Configure Radio profile contents and then press the Apply button to take effect.

5. In the AP Management, press the Clone button first and then press the Save & Apply button.
At last, press the Save button in the upper right corner of the page to take effect.

6. The system is now processing.

7. Check the result of the WDAP-C7210E.


1. The topology is as follows:

*Note 1: There's a router that needs to be connected to WAN (Internet)
*Note 2: For Mesh networking, please connect to two devices each time, and then add other agents after a successful connection.
2. Enter the login page (192.168.1.1); the factory login password is "admin", click login to enter the management page.

3. For every device that needs to be mesh networking, please make sure to set the Wi-Fi password.

4. Click "Wi-fi Mesh" on the main menu, select "Auto" for networking, and then click the "Confirm" button.

Please select "Auto" for networking for all the devices. The system will automatically allow the device which is connected to the Internet (WAN) to be the "controller", and the others will automatically become the "agents".
5. After the above operations are completed, briefly press the WPS/RST button (or MESH page>”Start Mesh” button) of the controller and agent at the same time, and wait for two minutes.

6. Enter the management page of WDRT-1800AX to check whether the networking is successful.
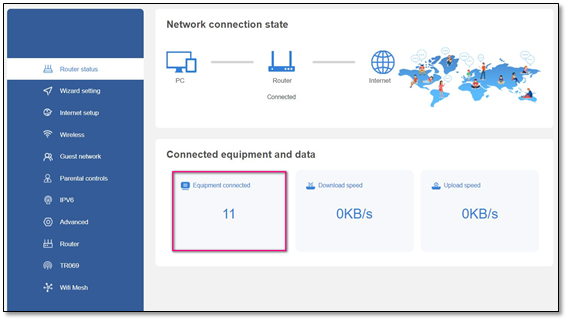
If successful, it will display the information of the controller and networking members:

The guide is suitable for the WDAP-C7200E,WDAP-W750E,WNAP-W2200UE,WNAP-C3220E,WBS-502N,WBS-202N,WAP-552N,WAP-252N,WDAP-802AC and WBS-512AC.
Here,we use two WBS-512AC and a WDAP-C7200E to set WDS as the topology is shown below.
Topology:

[1-WBS-512AC]
1. Wizard à select “Super WDS Mode”.

2. Fill out the SSID name by keying in.
èThe SSID here is for WDS connection,not for connecting to a client via Wi-Fi.
èOn this page,we set the SSID first.
èAfter finishing the second and third device settings,we could go back to the first device to configure WDS.
Note: Three APs need to use the same Key.

3. Select channel and bandwidth.
Note: Three APs need to use the same Channel.

4. Change the LAN IP address.

[2-WBS-512AC]
1. Wizard à select “Super WDS Mode”.

2. Fill out the SSID name by keying in and press the “Scan” button.
Note: Three APs need to use the same Key.

3. Select “WDS-1”.
Note: While choosing the SSID,you have to confirm that the first character of MAC which is "C",meaning that this SSID supports WDS connection.
Note: When the mode is in WDS and an SSID name has been created,the AP will create a virtual MAC automatically;this MAC can’t be used for Wi-Fi client connection.

4. Confirm SSID and MAC.

5. Select channel and bandwidth.
Note: Three APs need to use the same Channel.

6. Change the LAN IP address.

[WDAP-C7200E]
1. Wizard à select “Super WDS Mode”.

2. Fill out the SSID name by keying in and press the “Scan” button.
Note: Three APs need to use the same Key.

3. Select “WDS-1”.

4. Confirm SSID and MAC.

5. Select channel and bandwidth.
Note: Three APs need to use the same Channel.

6. Change the LAN IP address.

Back to the first device to configure WDS.
[1-WBS-512AC]
1. Wi-Fi à WDS à press the “Scan” button.

2. Select “WDS-2” and “WDS-3”.

3. Check SSID and MAC.

Check WDS connection status.
1. First WBS-512AC.

2. Second WBS-512AC.

3. WDAP-C7200E.

- Use the hardware-based switch on the left side of the WNAP-1260 to set the operation mode to AP mode.

- Connect your PC to the unit directly with an RJ45 UTP cable.
- Use the link below to download the PLANET Smart Discovery software from PLANET official website.
https://www.planet.com.tw/en/support/downloads
- Launch the Smart Discovery software, and click the “Refresh” button to display the information of the device that connects to your network.

- Find the WNAP-1260 from the Device Name field to get the IP address for the unit.
The major different between GT-80x(v2) and GT-80x(v1) are the supported Jumbo frame size and the new feature – OAM (operations, administration, and maintenance) Terminal/Edge mode supported. Except the two items, GT-80x(v2) and GT-802(v1) have the same appearance and functions.
|
Model |
GT-80x(v2) |
GT-80x(v1) |
|
Jumbo Frame Size |
9K bytes |
1536 bytes |
|
OAM |
TS-1000 OAM terminal mode |
-- |
|
OAM Loop Back Test Reply |
Yes |
-- |